When we bought our first house, it was in pretty rough shape. Let’s call it a “true fixer.” The previous owner had lived there a long time and was a smoker. We needed to strip everything. It was fun, but a lot of work! Today I’m going to show you one of my favorite completed projects: a step by step tutorial for how to install a paper bag floor.
Paper Bag Floor DIY
Full disclosure: paper bag floors aren’t difficult, or expensive, but they are time consuming. We didn’t have to move into our house right away, so we were able to take our time on the floors. I didn’t want to post about this project until we had a little time to see how they held up. A year later, they all still look awesome!
We did paper bag flooring in two rooms and haven’t had a problem with either floor, and I firmly believe that is because we used five coats of poly instead of just one or two. Be sure to read all the way to the bottom of the post because I have some final “success tips” for you there.
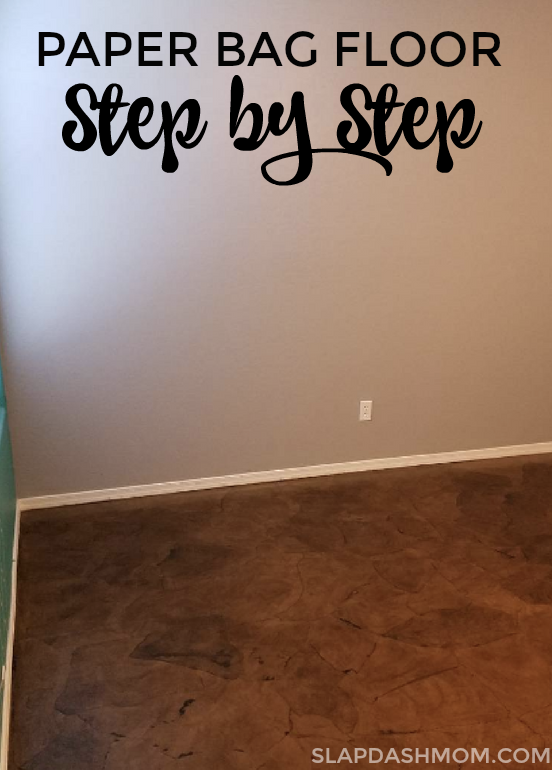
Paper Bag Floor DIY: Step by Step
If I missed anything, be sure to leave me a comment and I’ll add it. This is a tedious process but fun nonetheless, and SUPER CHEAP as far as flooring goes. It’s held up to our foot (and paw) traffic, and we love it.
Supplies Needed for Paper Bag Floors
Roll of brown kraft paper
Spray bottle (nothing fancy – just for water)
Glue
Water
Paint stirrers
Paint brushes
5 gallon bucket
Tape
Stain
Gloves (like dishwashing gloves)
Mask (for the stain process… whew!)
Microfiber cloths
Polyurethane
Shop Vac (for prep)
Sander or sand paper
Paper Bag Flooring Step 1: Prep
Prepping the floors can be a pain in the butt, but if you don’t do it right then there’s no point in doing the paper bag flooring at all because it won’t look right. Prep your floors by pulling up the carpet, removing all staples, and sanding everything until it’s smooth.
We had subfloor underneath our carpet so we had to fill the cracks with wood glue, let it dry, and then sand down spots that were rough. It doesn’t have to be perfect (you can use a coarse grade sandpaper), but it does need to be somewhat even. We used a hand sander.
After you’ve prepped and sanded the floors, use a Shop Vac to clean everything up. You might have to go over the floors more than once to make sure they’re clean, but this is important because you’re going to be gluing paper to it so if there’s any dirt there will be bumps and lumps and it’ll be ugly.
Paper Bag Flooring Step 2: Laying the Floor
Once your floors are ready, it’s time to tear the paper. We tore it into squares but I don’t actually recommend doing it this way, for many reasons.
1. It’s more time consuming to tear into squares because you have to make sure they’re straighter, etc.
2. The squares don’t stick down as well as the random shapes do.
We found that torn pieces around 10″ in length and 3-6″ in width worked well for our in the second room. When we had done 12×12 squares for the first room, it just didn’t look as nice.
When working with the edges, though, you need one side to be straight (to fit up against the baseboards). Alternatively, you could glue it down and use a razor knife to cut it straight up against the baseboards.
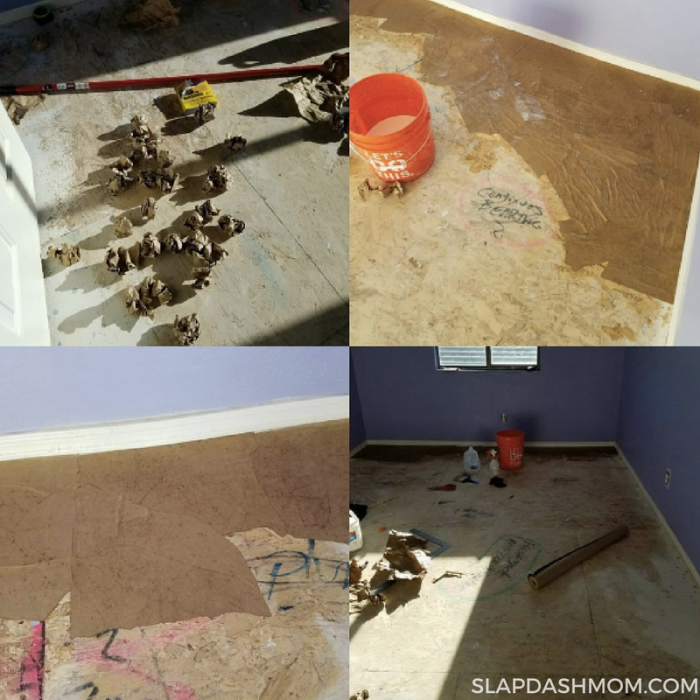
Tearing lots of pieces at once, setting aside the edge pieces, will save you the most time. Once the pieces are torn, LIGHTLY spray them with water, a few at a time, and wrinkle them up (like in the photo above).
Mixing The Glue
Mix the glue with water. We did this by pouring both glue and water into a 5 gallon bucket and using paint stirrers to mix it up.
Most tutorials we read recommended a 50/50 mixture, but we did more like 60/40 (glue being 60, water being 40), because 50/50 was a bit too thin.
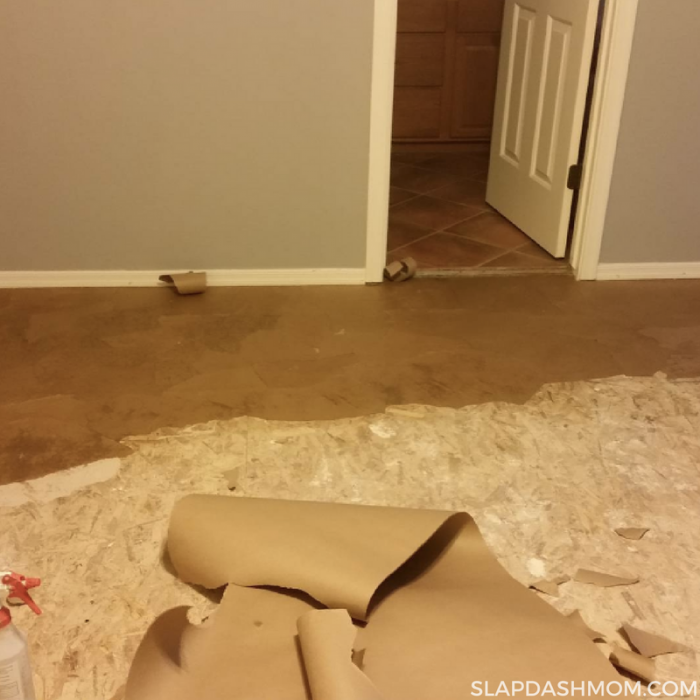
Start with the edge pieces, in a corner of the room. Make sure you’ve lightly sprayed them with water and wrinkled them up. Using a paint brush, brush glue down on your floor in a 2ft by 2ft section. Don’t do too big of a section at once or the glue will dry before you can lay the kraft paper down.
Lay a piece of the kraft paper on top of the glue-brushed floor. Smooth the paper out with your hands, but don’t freak out if there are wrinkles or cracks. As long as the wrinkles aren’t raised too high, they’ll give the floor character and won’t be bumpy.
After you smooth the paper down, dip your brush in the glue mixture and brush a nice even, thin layer over the top of the kraft paper. Move on to the next piece, overlapping a little bit each time.
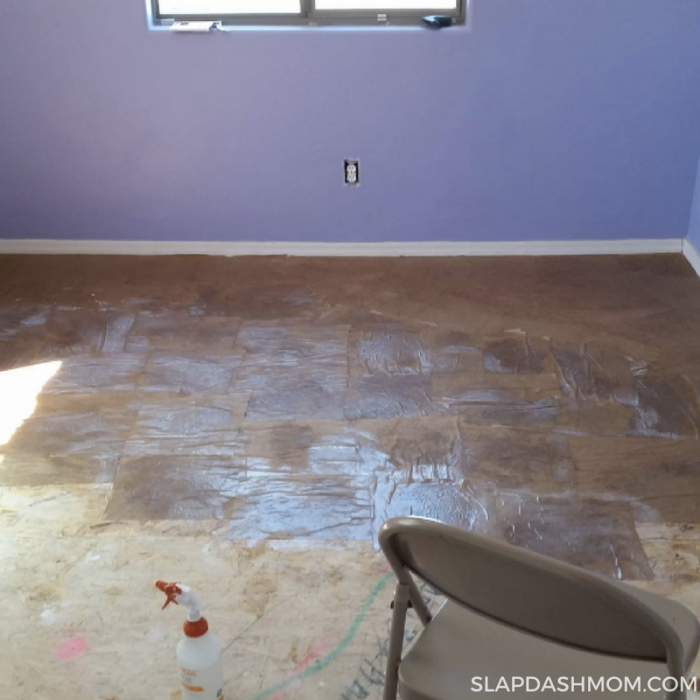
Overlapping is the key to keeping everything glued down, which is why the squares didn’t work quite as well. The paper bag is going to look/be wet, and that’s okay, just make sure you’re not putting SO much glue that it’s sopping wet.
Work piece by piece until you’ve finished the room. If you take breaks in between and there’s foot traffic, keep your Shop Vac handy because you will need to use it again. Also, if you can avoid foot traffic, that’s best.
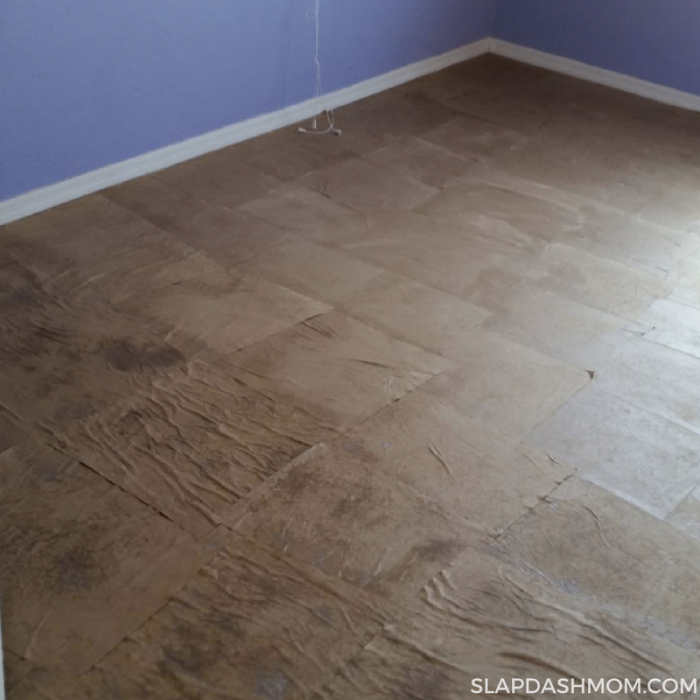
If any pieces start to come up, just wet underneath them with the glue mixture, then brush over top like you did before. If you notice gaps, just add a small piece of kraft paper on top to cover the entire floor.
Paper Bag Flooring Step 3: Stain
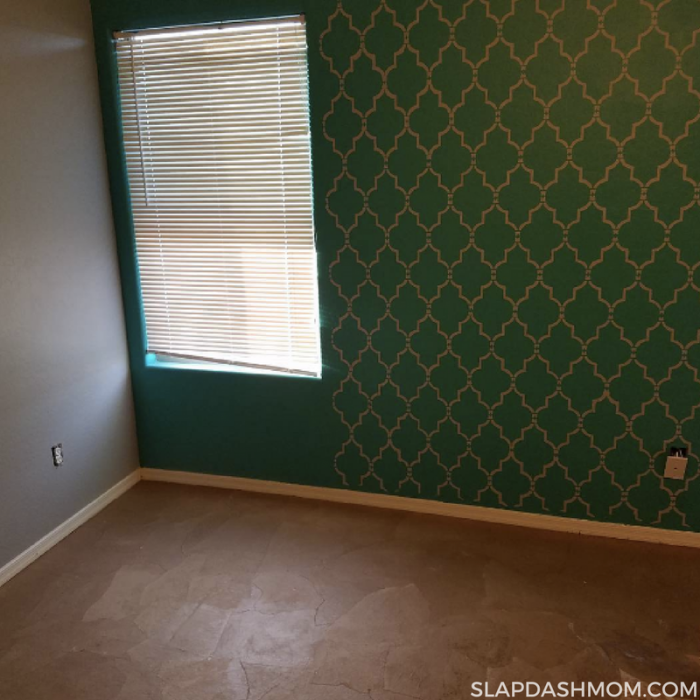
Once the paper bags are completely dry, you can move on to staining them. Using tape to tape the baseboards off in the same way you would if you were painting. We tried other tape and it came off and made a mess, so don’t skimp on the tape, whatever you do.
If you have one, turn your ceiling fan on before you start, and open the windows as long as it’s not going raining or snowing outside. Let’s just say you are going to need some ventilation.
If you don’t have a ceiling fan, I recommend you put a floor fan somewhere in the room, where it won’t interfere with the floor, just to keep the air circulating.
Just like with mopping a floor, you need to have an exit plan. Start towards the back of the room, and work your way to the front entryway.
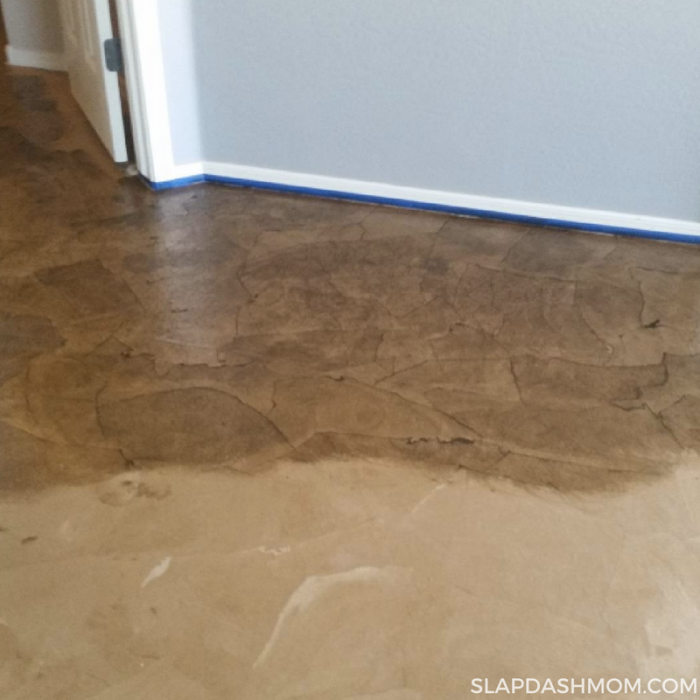
Make sure you have your gloves and mask on, and grab your microfiber cloth and stain. Wad up the microfiber cloth and dip it into the stain. Starting from the corner/wall, start staining the floor in a circular motion. If you notice puddles or spots that didn’t get covered, go back over it but there’s no need to keep dipping the cloth in the stain because a little goes a long way.
We only did one layer of stain but you can do another layer if you want it to be darker. The stain does take a little while to dry so make sure your fans are going or you’ll be waiting forever. The stain needs to be dry before you move on to the next step.
Avoid walking on the surface until the stain is dry. The next step is polyurethane. Remove the Frog Tape before you start with the poly.
Paper Bag Flooring Step 4: Polyurethane
Polyurethane is the most expensive part of the process, but it’s also one of the most important so don’t skimp on it. We paid about $50 for a gallon of the poly. Like I said before, the reason I think our floors have held up to heavy foot traffic when others have not is because we did five layers of poly.
We used Varathane No Odor Interior Polyurethane Gloss.
I’m going to repeat that because if you get the kind that isn’t odorless, or you get semigloss instead of gloss, you will not be happy.
We used Varathane No Odor Interior Polyurethane Gloss. Remember to get the gloss kind not the semi-gloss, and make sure you get the no odor kind. You’ll need a gallon for each room (our rooms are about 12×14).
Apply the polyurethane with a wide paint brush, corner to corner, working your way out of the room like you did previously. It dries rather quickly, so it won’t take long to add five coats.
Finished Product + More Great Ideas
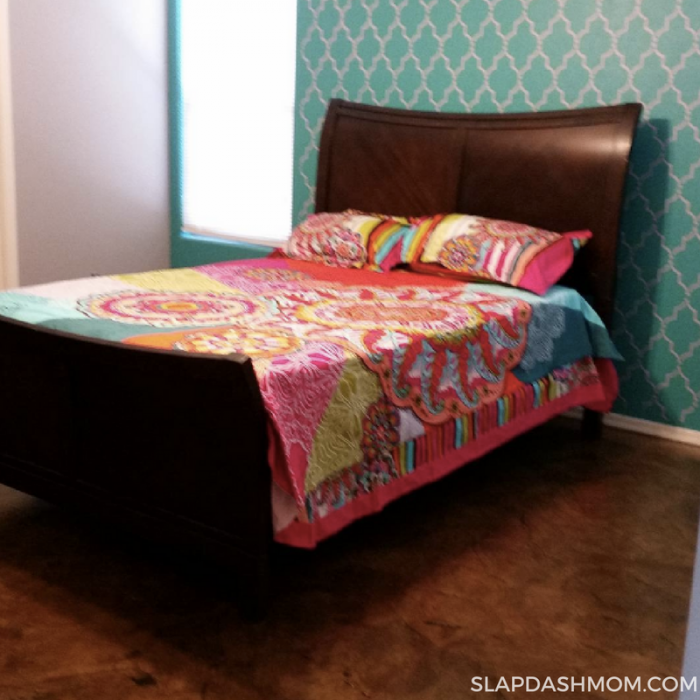
After the poly dried, the floors were pretty shiny but not overly so. Everyone who has seen them absolutely loves the gloss and we do, too!
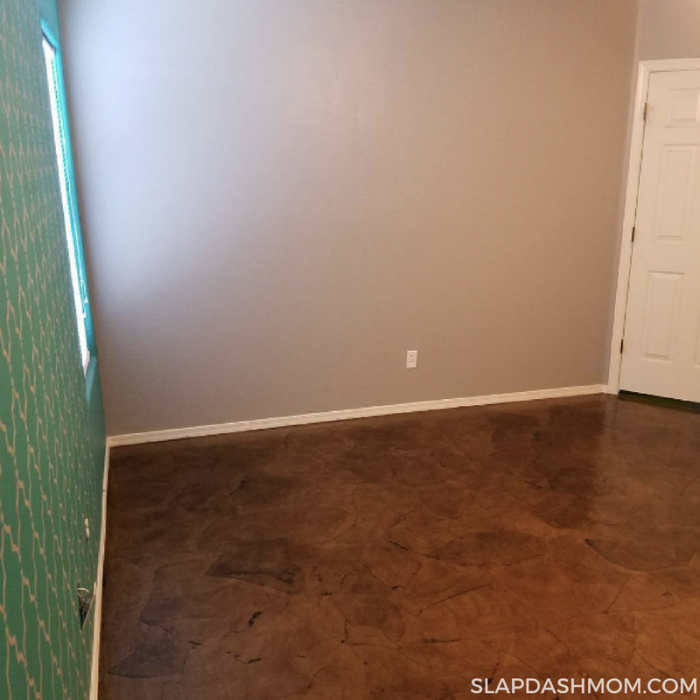
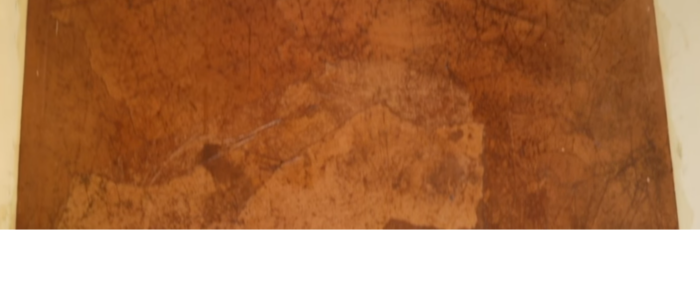
The floors really hold up but there are a few things you need to know:
If you don’t do five coats of poly, pets can easily scratch the floor and cause problems. If you have large dogs, who like to slide across the floor, you will want to put massive amounts of poly down.
If you spill water on these floors, clean it up immediately. In that respect, treat it like it is real hard woo. I have read warning after warning about it and thankfully we have only had a few instances where water got spilled. It was cleaned up quickly and did not cause any damage.
I would NOT do this in a bathroom or kitchen because of bath water, sinks, toilets, etc. That’s just too risky in my opinion.
What Other Ideas Are There For Paper Floors:
Get creative with your paper floors. Use Trader Joe’s or Whole Foods bags to make a statement. Use newspapers, comic pages, old book pages, maps and/or whatever else you can think of to make the floor more interesting and creative. The sky is the limit with this project.
KEEP READING BELOW FOR FINAL TIPS AND TRICKS TO MAKE SURE YOUR FLOORS COME OUT AMAZING
Paper Bag Floor DIY – Easy Step by Step Tutorial
Materials
- Roll of brown kraft paper
- Spray bottle for water
- Glue
- Water
- Paint stirrers
- Paint brushes
- 5 gallon bucket
- Frog Tape
- Stain
- Gloves like dishwashing gloves
- Mask for the stain process… whew!
- Microfiber cloths
- Polyurethane
- Shop Vac for prep
Instructions
- PREP: Prepping the floors can be a pain in the butt, but if you don't do it right then there's no point in doing the paper bag flooring at all because it won't look right. Prep your floors by pulling up the carpet, removing all staples, and sanding everything until it's smooth. We had subfloor underneath our carpet so we had to fill the cracks with wood glue, let it dry, and then sand down spots that were rough. It doesn't have to be perfect (you can use a coarse grade sandpaper), but it does need to be somewhat even. We used a hand sander.
- After you’ve prepped and sanded the floors, use a Shop Vac to clean everything up. You might have to go over the floors more than once to make sure they’re clean, but this is important because you’re going to be gluing paper to it so if there’s any dirt there will be bumps and lumps and it’ll be ugly.
- LAYING THE FLOOR: Once your floors are ready, it's time to tear the paper. We started with Sapphire's room, kind of as an experiment. We tore the paper into squares and I DO NOT RECOMMEND THIS, for many reasons. First, it is more time consuming to tear into squares because you have to make sure they're straighter, etc. Second, the squares don't stick down as well as the random shapes do.
- We found that torn pieces around 10″ in length and 3-6″ in width worked well for our bedroom. We did 12×12(ish) squares for Sapphire's room and it just didn't look as nice. When working with the edges, though, you need one side to be straight (to fit up against the baseboards). Alternatively, you could glue it down and use a razor knife to cut it straight up against the baseboards.
- Tearing lots of pieces at once, setting aside the edge pieces, will save you the most time. Once the pieces are torn, LIGHTLY spray them with water, a few at a time, and wrinkle them up (like in the photo above).
- MIXING THE GLUE: Mix the glue (THIS GLUE) with water. We did this by pouring both into a 5 gallon bucket and using paint stirrers to mix it up. Most tutorials we read recommended a 50/50 mixture, but we did more like 60/40 (glue being 60, water being 40), because 50/50 was a bit too thin.
- Start with the edge pieces, in a corner of the room. Make sure you’ve lightly sprayed them with water and wrinkled them up. Using a paint brush, brush glue down on your floor in a 2ft by 2ft section. Don’t do too big of a section at once or the glue will dry before you can lay the kraft paper down. Lay a piece of the kraft paper on top of the glue-brushed floor. Smooth the paper out with your hands, but don’t freak out if there are wrinkles or cracks. As long as the wrinkles aren’t raised too high, they’ll give the floor character and won’t be bumpy.
- After you smooth the paper down, dip your brush in the glue mixture and brush a nice even, thin layer over the top of the kraft paper. Move on to the next piece, overlapping a little bit each time.
- Overlapping is the key to keeping everything glued down, which is why the squares didn’t work quite as well. The paper bag is going to look/be wet, and that’s okay, just make sure you’re not putting SO much glue that it’s sopping wet.
- Work piece by piece until you’ve finished the room. If you take breaks in between and there’s foot traffic, keep your Shop Vac handy because you will need to use it again. Also, if you can avoid foot traffic, that’s best.
- If any pieces start to come up, just wet underneath them with the glue mixture, then brush over top like you did before. If you notice gaps, just add a small piece of kraft paper on top to cover the entire floor.
- STAIN: Once the paper bags are completely dry, you can move on to staining them. Using Frog Tape, tape the baseboards off in the same way you would if you were painting. We tried other tape and it came off and made a mess, so don't skimp on the Frog Tape.
- Turn your ceiling fan on before you start, and open the windows as long as it's not going to rain. You're going to need some ventilation.Just like with mopping a floor, you need to have an exit plan. Start towards the back of the room, and work your way to the front entryway.
- Make sure you have your gloves and mask on, and grab your microfiber cloth and stain. Wad up the microfiber cloth and dip it into the stain. Starting from the corner/wall, start staining the floor in a circular motion. If you notice puddles or spots that didn't get covered, go back over it but there's no need to keep dipping the cloth in the stain because a little goes a long way.
- We only did one layer of stain but you can do another layer if you want it to be darker. The stain does take a little while to dry so make sure your fans are going or you'll be waiting forever. The stain needs to be dry before you move on to the next step.Avoid walking on the surface until the stain is dry.
- Remove the Frog Tape before you start with the poly.
- POLYURETHANE: Polyurethane is the most expensive part of the process, but it's also one of the most important so don't skimp on it. We paid about $50 for a gallon of the poly. Like I said before, the reason I think our floors have held up to heavy foot traffic when others have not is because we did five layers of poly.
- Apply the polyurethane with a wide paint brush, corner to corner, working your way out of the room like you did previously. It dries rather quickly, so it won’t take long to add five coats.
Notes
- If you don’t do five coats of poly, pets can easily scratch the floor and cause problems. Our 3 pit bulls haven’t caused any damage yet and again, that’s because of the massive amounts of poly we put down.
- Do not spill water on these floors! I have read warning after warning about it and thankfully we have only had a few instances where water got spilled. It was cleaned up quickly and did not cause any damage.
- I would NOT do this in a bathroom or kitchen because of bath water, sinks, toilets, etc. That’s just too risky in my opinion.
Final Tips & Tricks To Make Sure Your Paper Floors Are Amazing:
At the risk of seeming redundant, I want to go over just a few final things here. I’m really only reiterating because these steps are so important to the success of you paper floor job. So bare with me and just go over them again – to make sure you got it.
One of the most important steps in creating a paper bag floor is preparing the surface before starting the installation process. It is crucial to thoroughly clean and prep the area before moving forward. Especially if the previous owner did not take good care of the floors.
You will want to begin by removing any loose debris or dirt by sweeping or vacuuming the entire floor. This will ensure that the paper bags adhere properly to the surface and create a smooth finish. Additionally, if there are any stubborn stains or residue, you might consider using a mild detergent or a specialized cleaner to remove them effectively.
After cleaning, it is essential to inspect the floor for any cracks, holes, or uneven spots. These imperfections can negatively affect the paper bag installation and durability in the long run. Therefore, make sure to fill in any gaps with a suitable floor filler and sand down any raised areas to create a level surface.
Once the surface is clean, smooth, and repaired, it is time to start the exciting part of the process – creating your paper bag floor! Stay tuned for the next section of this tutorial, where I will guide you step by step on how to achieve a beautiful and durable paper bag floor in your home.
The glue can get expensive and you will need a lot of it. Go to places like Walmart and get a large gallon bucket of it – to make it a much more affordable paper floor version.








Leave a Reply