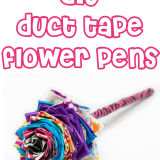
Duct Tape Flower Pen Tutorial
This Duck Tape Flower Pen Tutorial fits in perfectly with the rest of my DIY projects… everyone knows the Slap Dash Family is obsessed with Duct Tape Projects. Or wait, is it Duck Tape Projects? Yeah, either way, we love it.
Materials
- Duct Tape
- Pens
- Good Scissors (optional, but a good idea)
Instructions
- Choose your duct tape pattern first! You'll be using one piece of duct tape about 2″ shorter longer than your pen is, and 2 pieces of duct tape 1″ wide, to cover the entire pen.
- First, place the 1″ wide piecesat each end. Then, take the bigger piece and wrap it around the pen.
- Now it's time to make the petals! Petals are just 2″ pieces of duct tape, folded: Fold the right corner up towards the top of the piece, leaving a little bit of the sticky side exposed. Then take the corner you made, and fold it down to form almost a pyramid shape.
- Note: For a small rose, you will have about 25 petals. Sometimes I use about 50 and make a bigger one.
- Keep the petals even. If you raise the petals up each time you go around, the rose is going to look like a tunnel.
- You can make the rose as big as you want, just make sure you stick the tape down firmly each time or it will fall apart.
- Keep the petals close together. Where one point ends, another needs to begin. You can start to spread them out more as the rose gets bigger, but if you spread them too far apart it looks sloppy.
- Just keep wrapping, and wrapping, and wrapping… and please be sure to PIN this while you're here!!